Raspberry Pi Pico 4x4 Macropad
/i/556481/products/2021-09-14T00%3A50%3A10.547Z-PXL_20210914_004745226.jpg?1631555465)
As seen on the Tindie Blog! as well as on the Adafruit Blog
Buy it on Tindie
Description
This is a 4x4 Keyboard/keypad/macropad kit for you to build a 16 key macropad with a Raspberry Pi Pico. All you need are 16 MX mechanical switches and keycaps and about an hour for assembly.
Entering the Bootloader & flashing CircuitPython
- Download CircuitPython UF2 file
- Enter the bootloader by pressing the reset switch while holding Boot switch pressed
- Copy the UF2 file to the RPI drive.
Firmware
Libraries needed
You need to download the Adafruit CircuitPython Bundle 7.x from the CircuitPython Libraries page.
Uncompress it and copy the library called adafruit_hid to the lib folder of your macropad.
Code
Copy the following to code.py
# SPDX-FileCopyrightText: 2021 Pierre Constantineau
# SPDX-License-Identifier: MIT
# Raspberry Pi Pico 4x4 Macropad
"""
    Code adapted from the following sources:
    MACROPAD Hotkey (https://learn.adafruit.com/macropad-hotkeys/project-code)
    Pico Four Keypad  (https://learn.adafruit.com/pico-four-key-macropad/code-the-four-keypad)
"""
import board
import keypad
import usb_hid
from adafruit_hid.keyboard import Keyboard
from adafruit_hid.keycode import Keycode
from adafruit_hid.keyboard_layout_us import KeyboardLayoutUS

kpd = Keyboard(usb_hid.devices)
keyboard_layout = KeyboardLayoutUS(kpd)

# define keys for 4x4 v1
keys = keypad.KeyMatrix(
    row_pins=(board.GP0, board.GP1, board.GP2, board.GP3),
    column_pins=(board.GP4, board.GP5, board.GP6, board.GP7),
    columns_to_anodes=True,
)


keymap = [
    ("Select all", [Keycode.LEFT_CONTROL, Keycode.A]),
    ("Cut", [Keycode.LEFT_CONTROL, Keycode.X]),
    ("Copy", [Keycode.LEFT_CONTROL, Keycode.C]),
    ("Paste", [Keycode.LEFT_CONTROL, Keycode.V]),
    ("Hello World", "Hello World"),
    ("Cut", [Keycode.LEFT_CONTROL, Keycode.X]),
    ("Copy", [Keycode.LEFT_CONTROL, Keycode.C]),
    ("Paste", [Keycode.LEFT_CONTROL, Keycode.V]),
    ("Select all", [Keycode.LEFT_CONTROL, Keycode.A]),
    ("Cut", [Keycode.LEFT_CONTROL, Keycode.X]),
    ("Copy", [Keycode.LEFT_CONTROL, Keycode.C]),
    ("Paste", [Keycode.LEFT_CONTROL, Keycode.V]),
    ("Select all", [Keycode.LEFT_CONTROL, Keycode.A]),
    ("Cut", [Keycode.LEFT_CONTROL, Keycode.X]),
    ("Copy", [Keycode.LEFT_CONTROL, Keycode.C]),
    ("Paste", [Keycode.LEFT_CONTROL, Keycode.V])
]

print("keymap:")
for key in keymap:
    print("\t", key[0])

while True:
    key_event = keys.events.get()
    if key_event:
        if key_event.pressed:
            print(keymap[key_event.key_number][0])
            sequence = keymap[key_event.key_number][1]
            for item in sequence:
                if isinstance(item, int):
                    if item >= 0:
                        kpd.press(item)
                    else:
                        kpdrelease(-item)
                else:
                    keyboard_layout.write(item)
        else:
            # Release any still-pressed modifier keys
            for item in sequence:
                if isinstance(item, int) and item >= 0:
                    kpd.release(item)
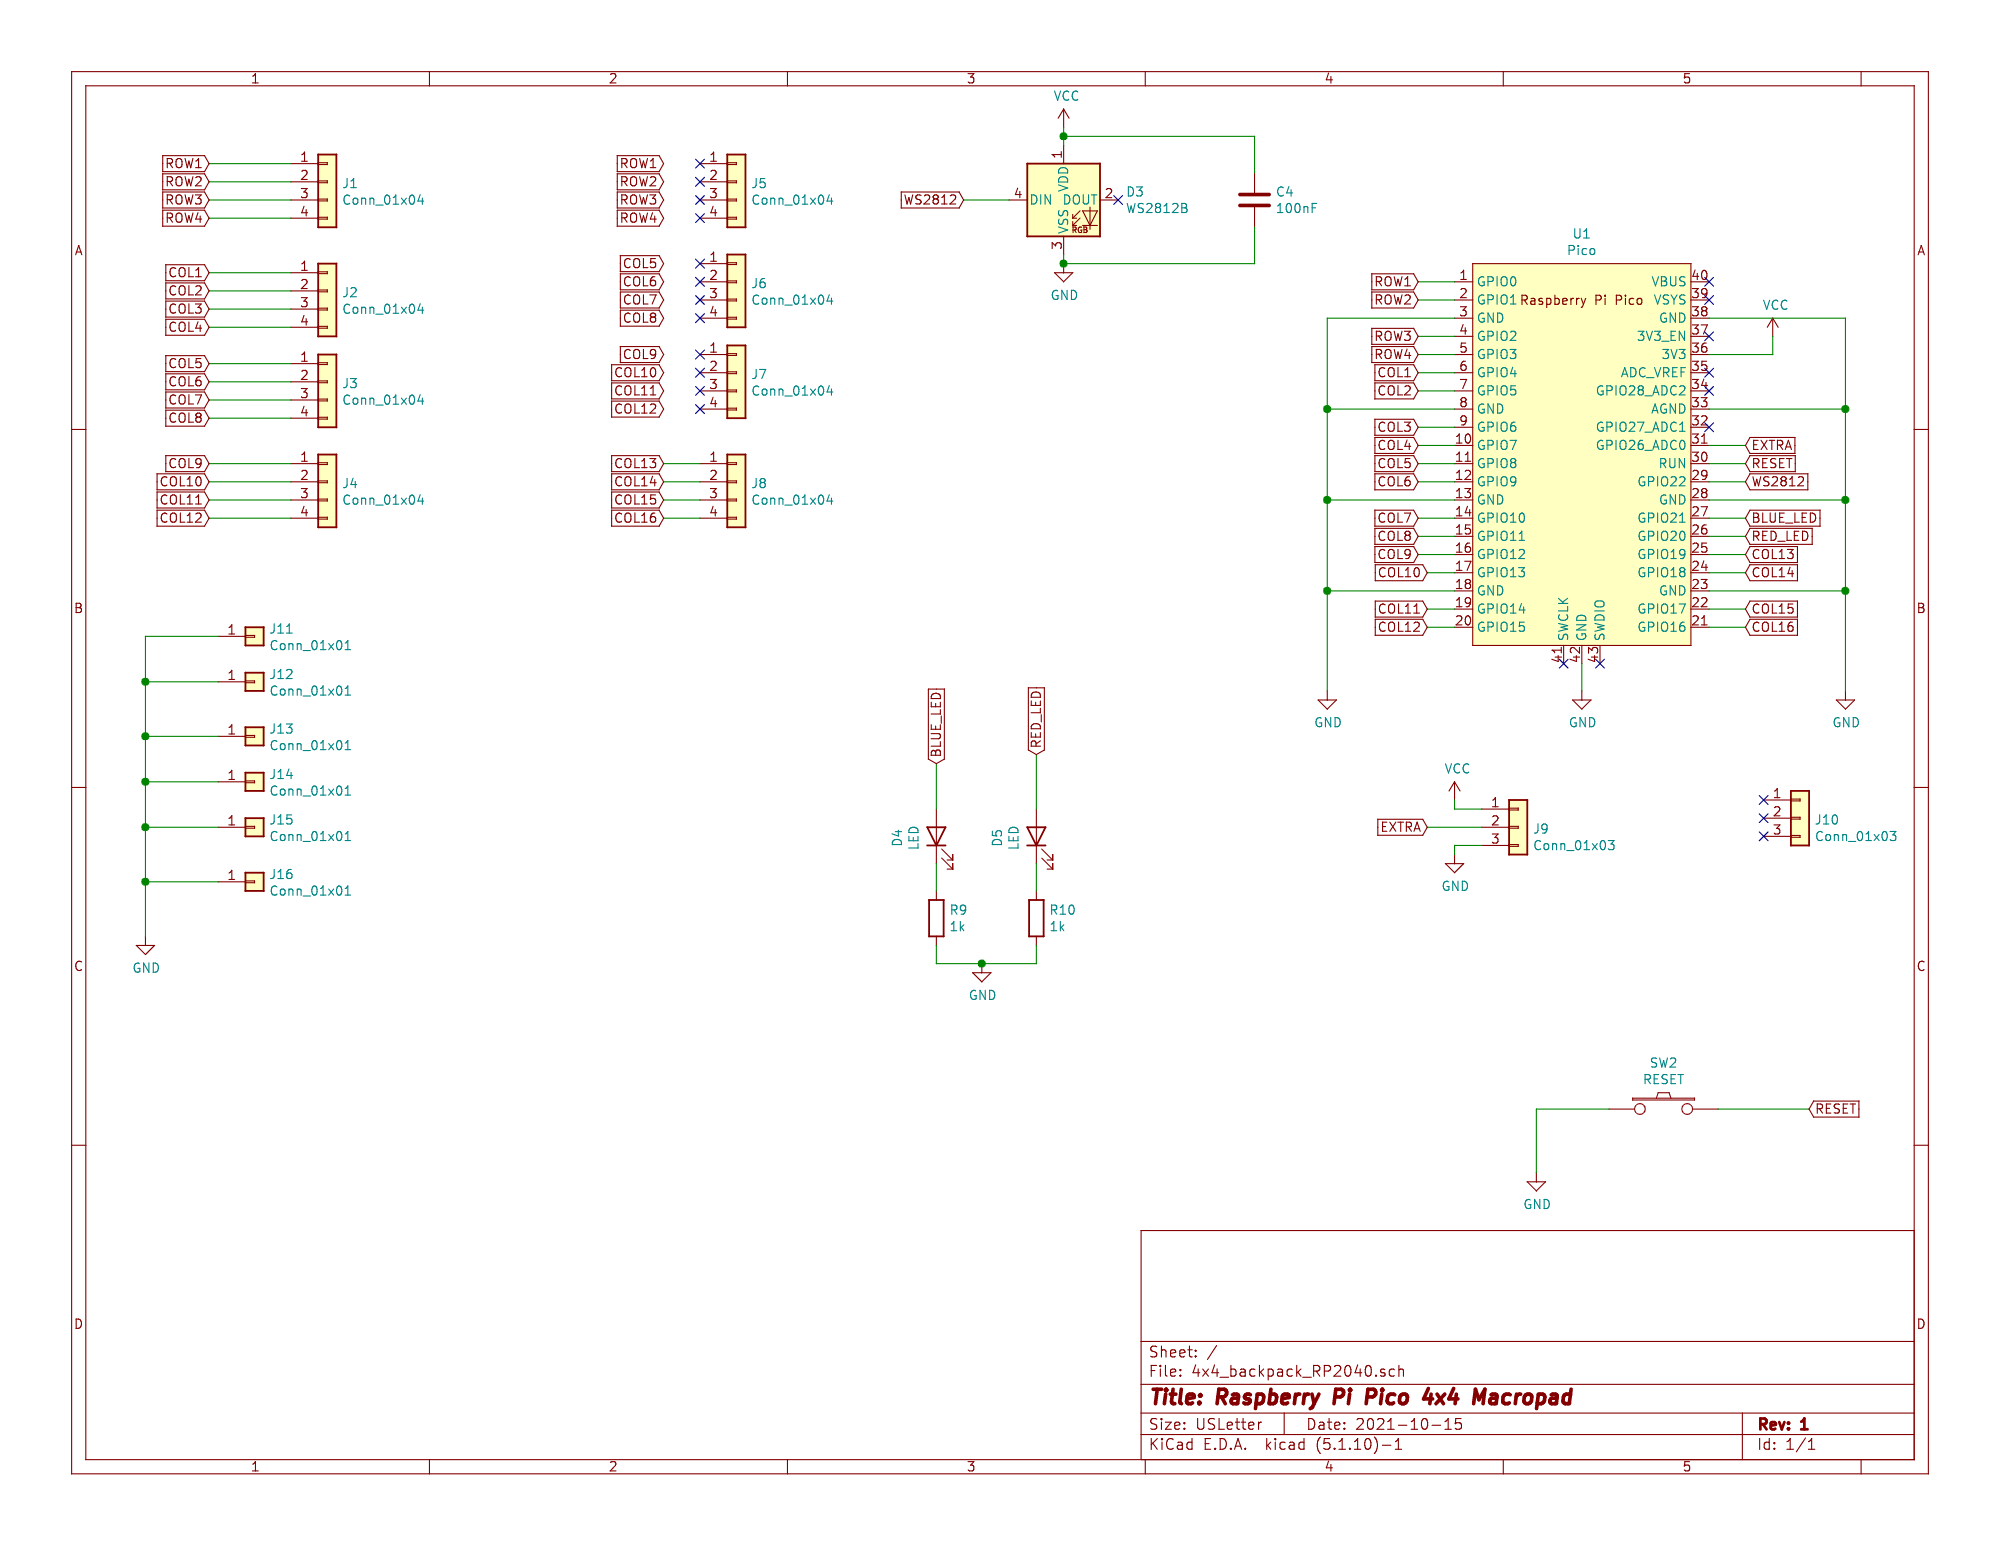
Schematic
PCB
Top of PCB

Bottom of PCB

Build Instructions - Summarized
Bottom PCB
- Solder RPI Pico on bottom plate
Top PCB
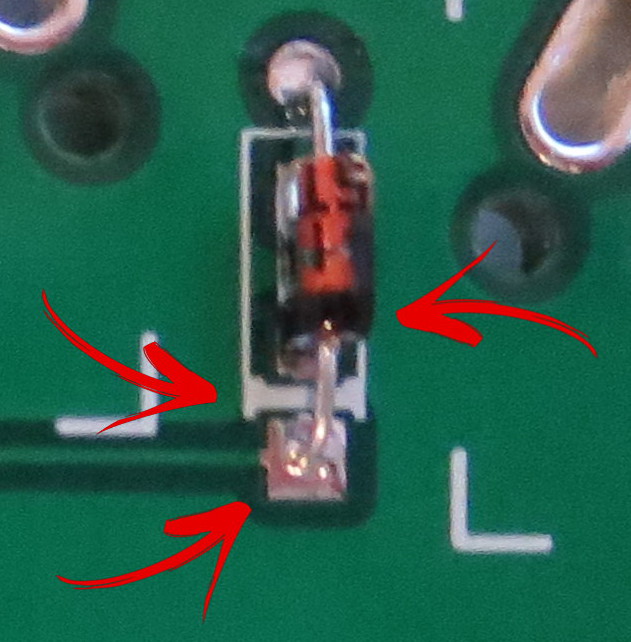
- Solder Diodes on Top Plate - make sure that the band on the diode is near the heavier line of on the silkscreen - or the square pad (depends on the top plate)
Join Top/Bottom PCB
- Cut the headers and sockets in group of 4.
- Join/connect the Header and Socket groups together
- Line up the top/bottom PCB so that the sockets are all on the same side (top or bottom - I usually have the pins at the bottom)
- make sure that the top plate can be read and has the same orientation as the bottom plate (Need pictures)
- Solder the Sockets
- Solder the pins
Solder Switches
- Disconnect the top/bottom PCB making sure to pull straight not to bend the pins
- Install the switches through the PCB. If you have a switch plate (a grid) push the switches through the switch plate as you install them on the PCB
- Inspect that all switch pins go through the PCB.
- Solder the switches
- Reconnect the Top/Bottom PCB
- Install keycaps
